As I was asked to bake a rainbow cake for an upcoming birthday, I thought it would get messy.. and it would be a lot of work… Well, yes, it is quite a lot of baking, but it doesn’t have to stress you out or leave your kitchen as if a masterclass war was going on in there!
I have found a great recipe for a 6 layers cake and then used the most delicious frosting ever. With a bit of preparation and the right tools by hand, it is going to be much easier then you thought and you will be able to fit it into your busy schedule.
Follow my tutorial with tipps on how to keep your kitchen clean and saving time and you’ll make a beautiful and tasty rainbow cake and will still be smiling afterwards!
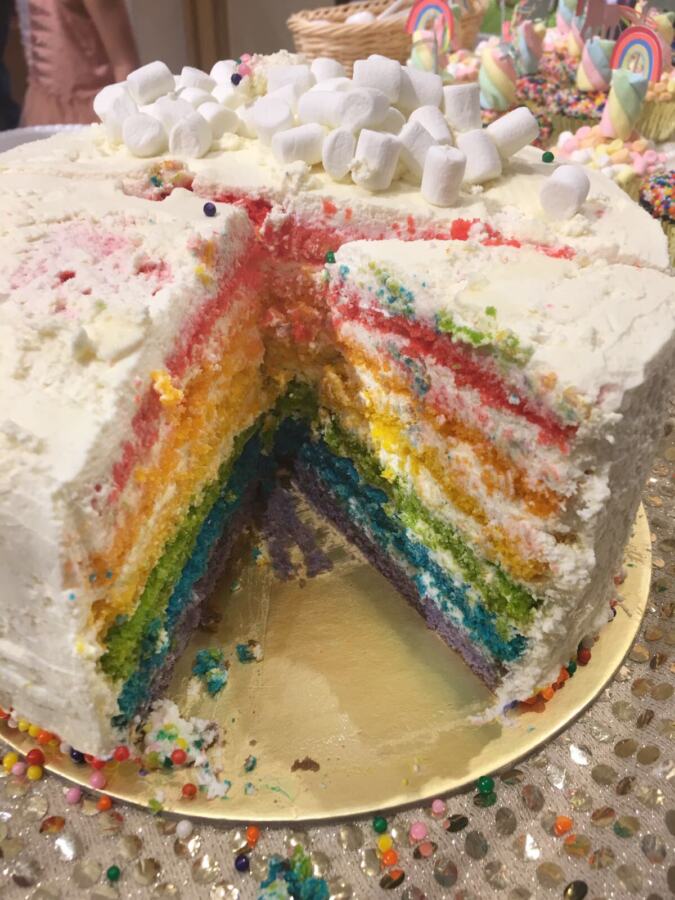
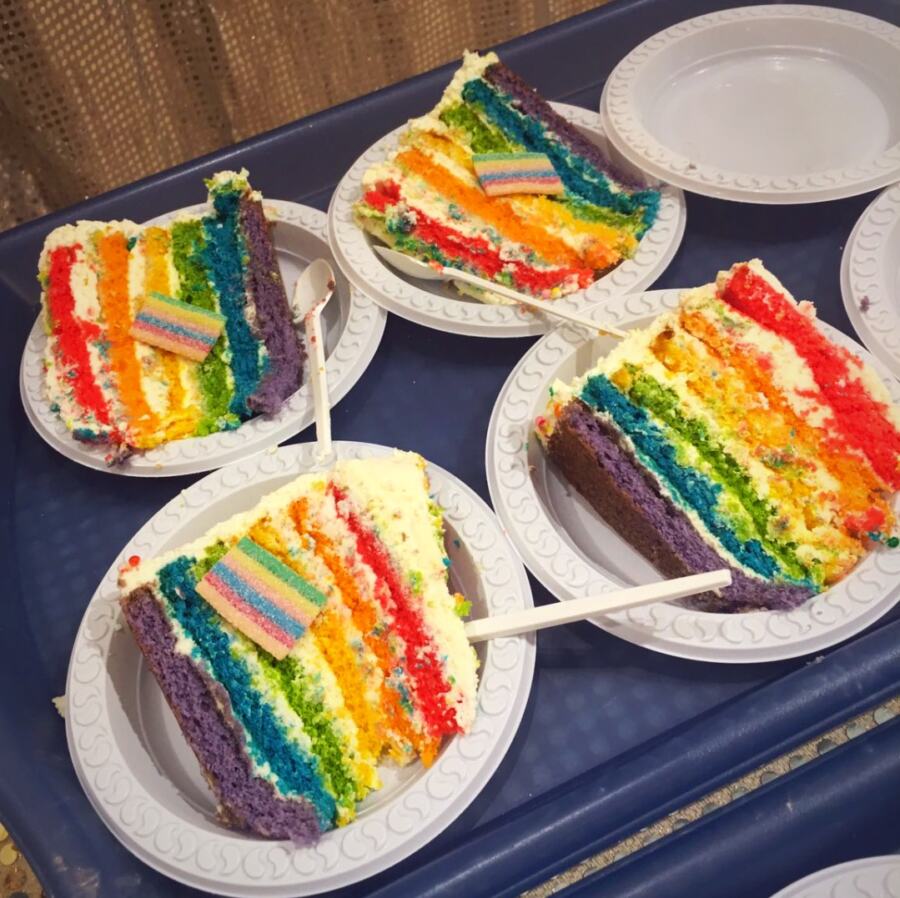
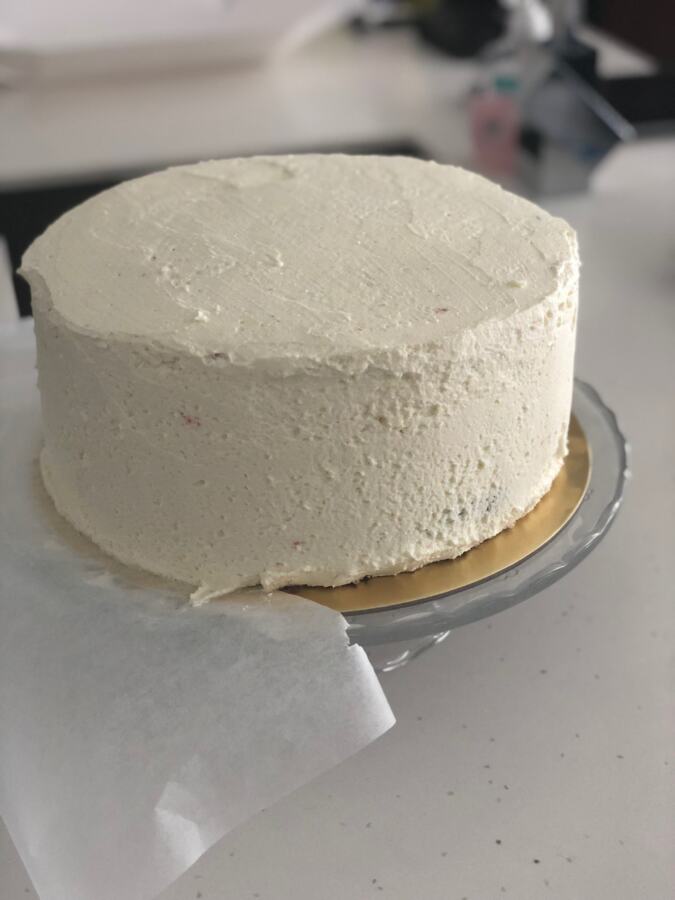
This cake is going to be very different from the store bought ones. No one is going to leave the frosting on the side, because it is delicious! The cake turns out to be moist and fluffy. Also, picky kids are going to ask for more. So be quick and grab your slice before it is gone!

Preparation:
A. Baking Tins and oven: first of all you want to check how many baking tins of the same size you have or you can borrow. And then you want to check how many are going to fit in your oven.
You really need to make sure that the tins are of the exact same size.
Also if you know that your oven does not bake evenly, it might be easier to cook just two cakes at a time, otherwise you will end up turning them around the whole time and that is not fun.
B. Measure your baking tins. I used a 22 cm round one. If yours are bigger, you will need to adapt the recipe, so that they don’t end up too thin. If yours are smaller, it’s fine, the cakes will just be higher then mine.
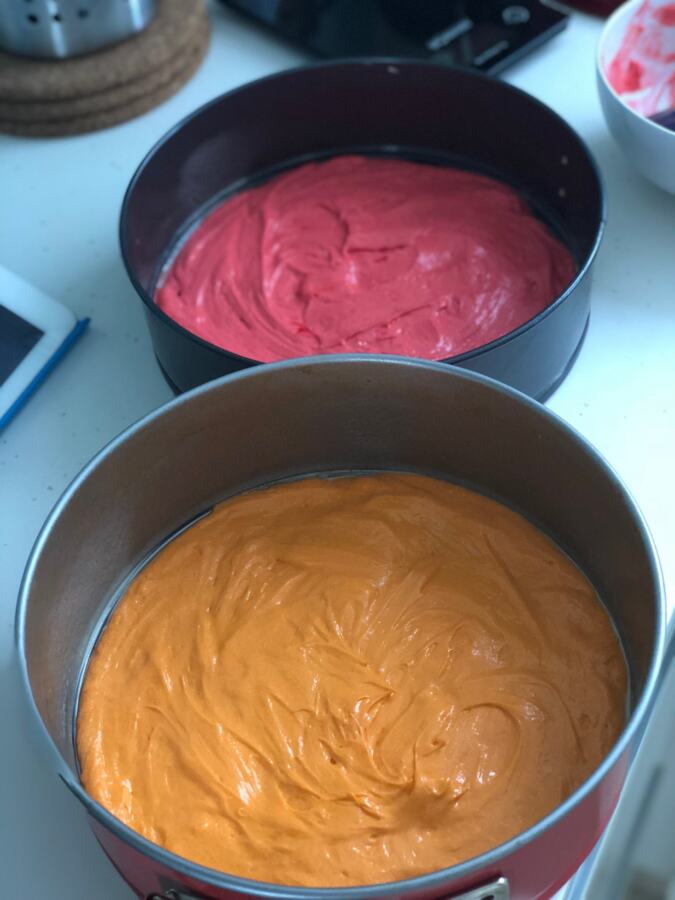
C. Make sure you have very good quality food gel colours for colouring your dough. They might be a bit more expensive, but you will need less and they will go a long way. My favourites are Wilton and Americolor (not affiliated).
D. If you don’t have one at home, get a non-stick baking spray, it will make it easier to release the cake from the tin. DO NOT FLOUR your tins or you will mess with the colours.
E. Plan ahead. You can bake the cakes well ahead, as we want to freeze them anyway. So if you do not want to invest too much time at once, you can also bake 2 layers a day one week ahead and then just freeze them. Remember it is best to let the layers rest in the freezer for at least 24 hours.

Schedule:
Ok, I will assume you only have 2 baking tins or you can only fit two in the oven, that was my case as well. If you have more, then everything will be quicker.
I will give you the timeline going backwards, assuming
* you need your cake Sunday afternoon
* you will have to frost it Sunday morning
* and you will have to defrost your layers (in the fridge) 24 hours before, so Saturday morning
* that means you need to have them done by Friday morning so that they can get nice and frozen for at least 24 hours.
Freezing the layers is going to make it easier to handle them as when they are freshly baked, so I really recommend you do not skip the freezing detail!
* Now you can bake all of your 6 layers, 2 at a time, on Thursday – this will take you 3-4 hours, as you will need to let the cakes cool down before being able to reuse the tins. Or alternatively, you can make 2 on Tuesday, 2 on Wednesday and 2 on Thursday. To bake two will only take you 1 hour. Sounds complicated, but planing ahead is going to make it much easier!
The cake needs to be done by Sunday afternoon
frosting on Sunday morning (plan 2-3 hours)
defrost layers in the fridge Saturday morning
freeze all layers by latest Friday morning
bake all layers on Thursday or 2 at a time the days before
Baking the cake:
First of all, I’ll make a list of the ingredients you need to make a 6 layers cake, then I will break it down for you so that you know the quantities needed for each layer, this way you can also adapt to more or fewer layers.
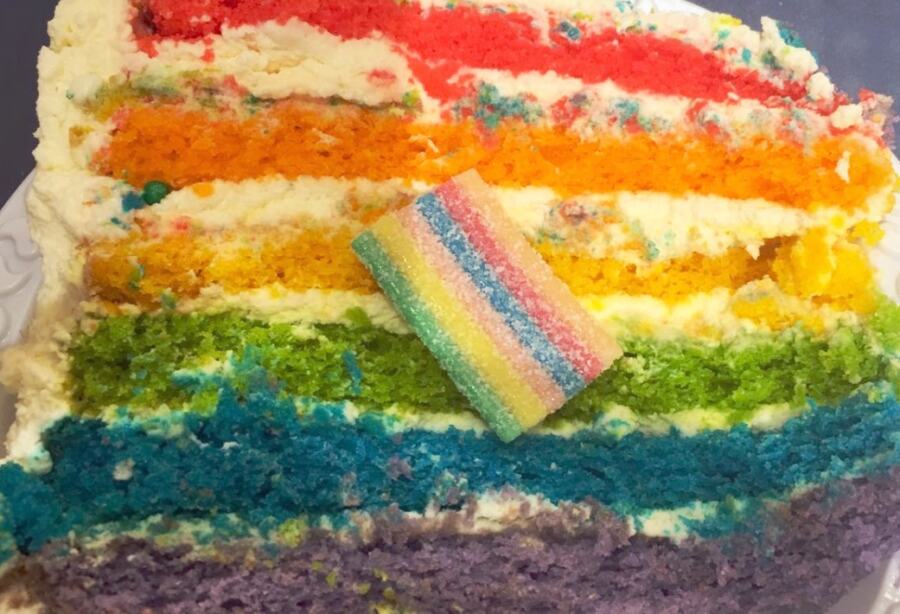
We do not like fondant or buttercream frosting, so we always use a simple but delicious mascarpone frosting. This will not give you a totally clean look, but more of a rustic one, as it is not going to be totally smooth. But nobody will leave it aside, as it is just too good.
If you prefer other fillings and fondant, just go for it!
Ingredients for the whole cake with mascarpone frosting:
* 350 g butter at room temperature (soft)
* 350 g of sugar
* 6 eggs
* 350 g of self-raising flour
* 3 teaspoons of baking powder
* 1 teaspoon of vanilla extract
* a couple of spoons of milk (max 3)
* gel food colours: red, orange, yellow, green, blue, purple
* 500 g of whipping cream
* 1 Kg of Mascarpone
* 3-6 tablespoons of icing sugar
Ingredients for one layer:
* 60 g of room temperature butter
* 60 g of sugar
* 1 egg
* 60 g of self-raising flour
* 1/2 teaspoon of baking powder
* a splash of vanilla extract
* half to one spoon of milk
* gel colour
Instructions:
Before we start baking, you need to decide how many layers you will bake at once.
This time I will not mention the quantities as not to confuse you.
1. Preheat the oven at 150 C degrees if you are using a fan oven, 170 C otherwise.
2. Spray your baking tin(s) with non-stick spray (if you don’t have one, you can also use melted butter instead, but apply only a very thin layer with a brush).
3. Mix the room temperature butter (should be soft) and sugar at high speed with a mixer until creamy and airy.
4. Add the egg(s), I used big ones, that weight approximately 60 g and some of the flour (possibly stiffed) mixed with the baking powder. If you are using more then one egg, it’s better to pour one at a time followed by a little bit of flour. Mix at medium speed until it comes together.
5. Finally, add the vanilla extract, or if you prefer any other flavour like lemon zest, almond, coconut…
6. Should the dough be too sticky, add some milk, one teespoon at a time. I usually need about 3 tablespoons for the six layers, but it really depends on your eggs and flour. If you are not sure, 1/2 a tablespoon to 1 tablespoon for each layer should do it.
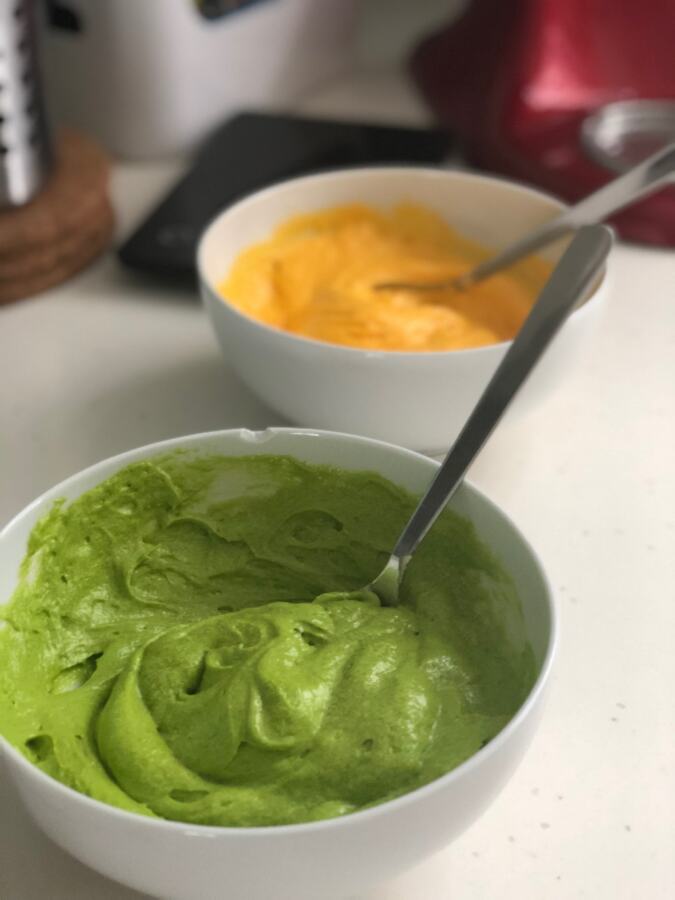
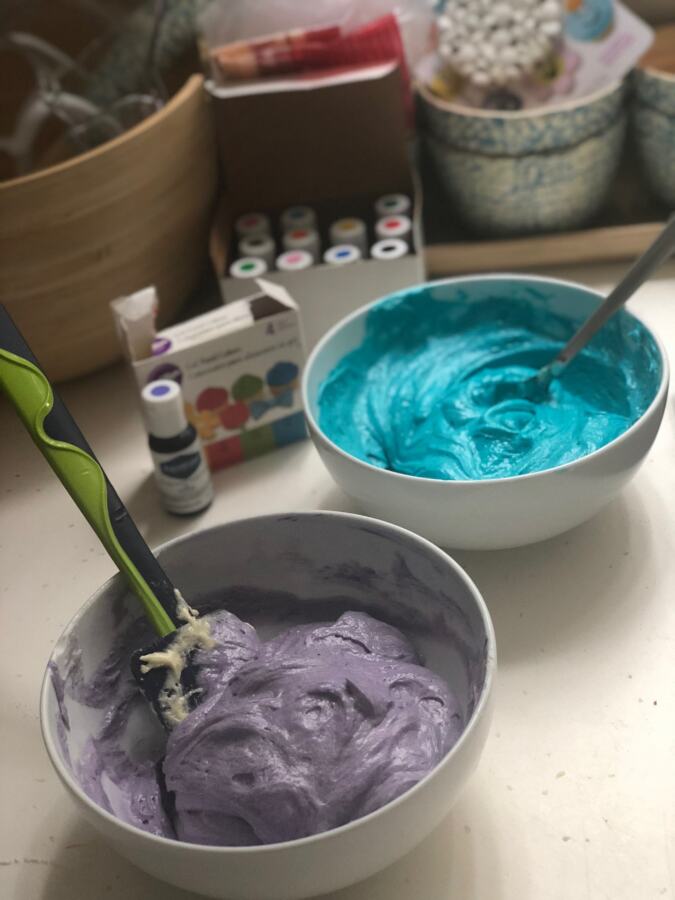
7. Time to use the colours. Get as many bowls as eggs you used and divide the dough equally in them. I weighted 230 g of dough for each layer.
8. Add a couple of drops of your gel colour to the dough and mix with a spoon or spatula. Add more if it is not vibrant enough. I needed about 5 drops for the right colours. Remember to use separate tools for each batch.
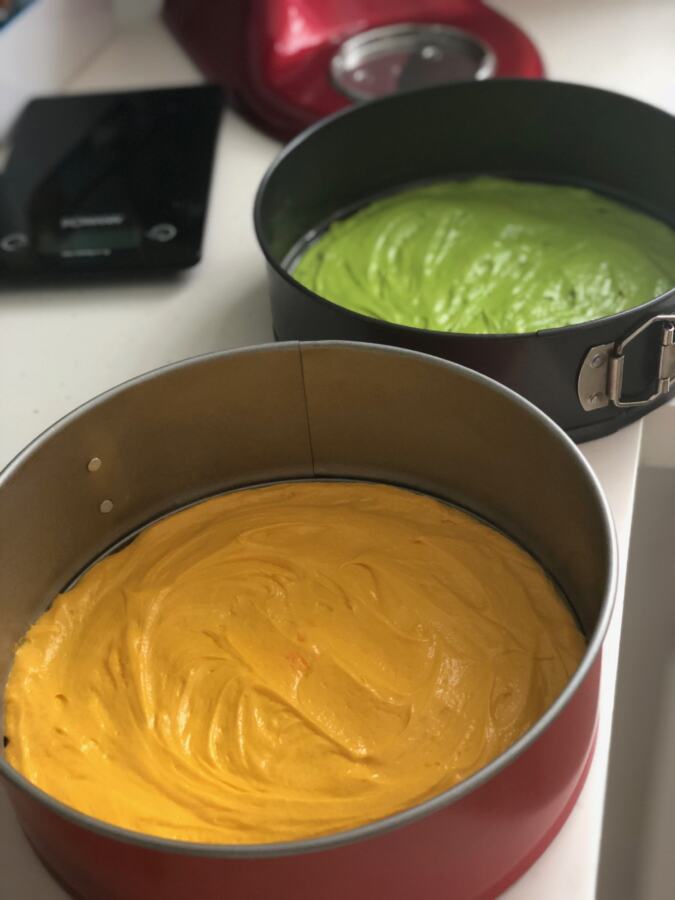
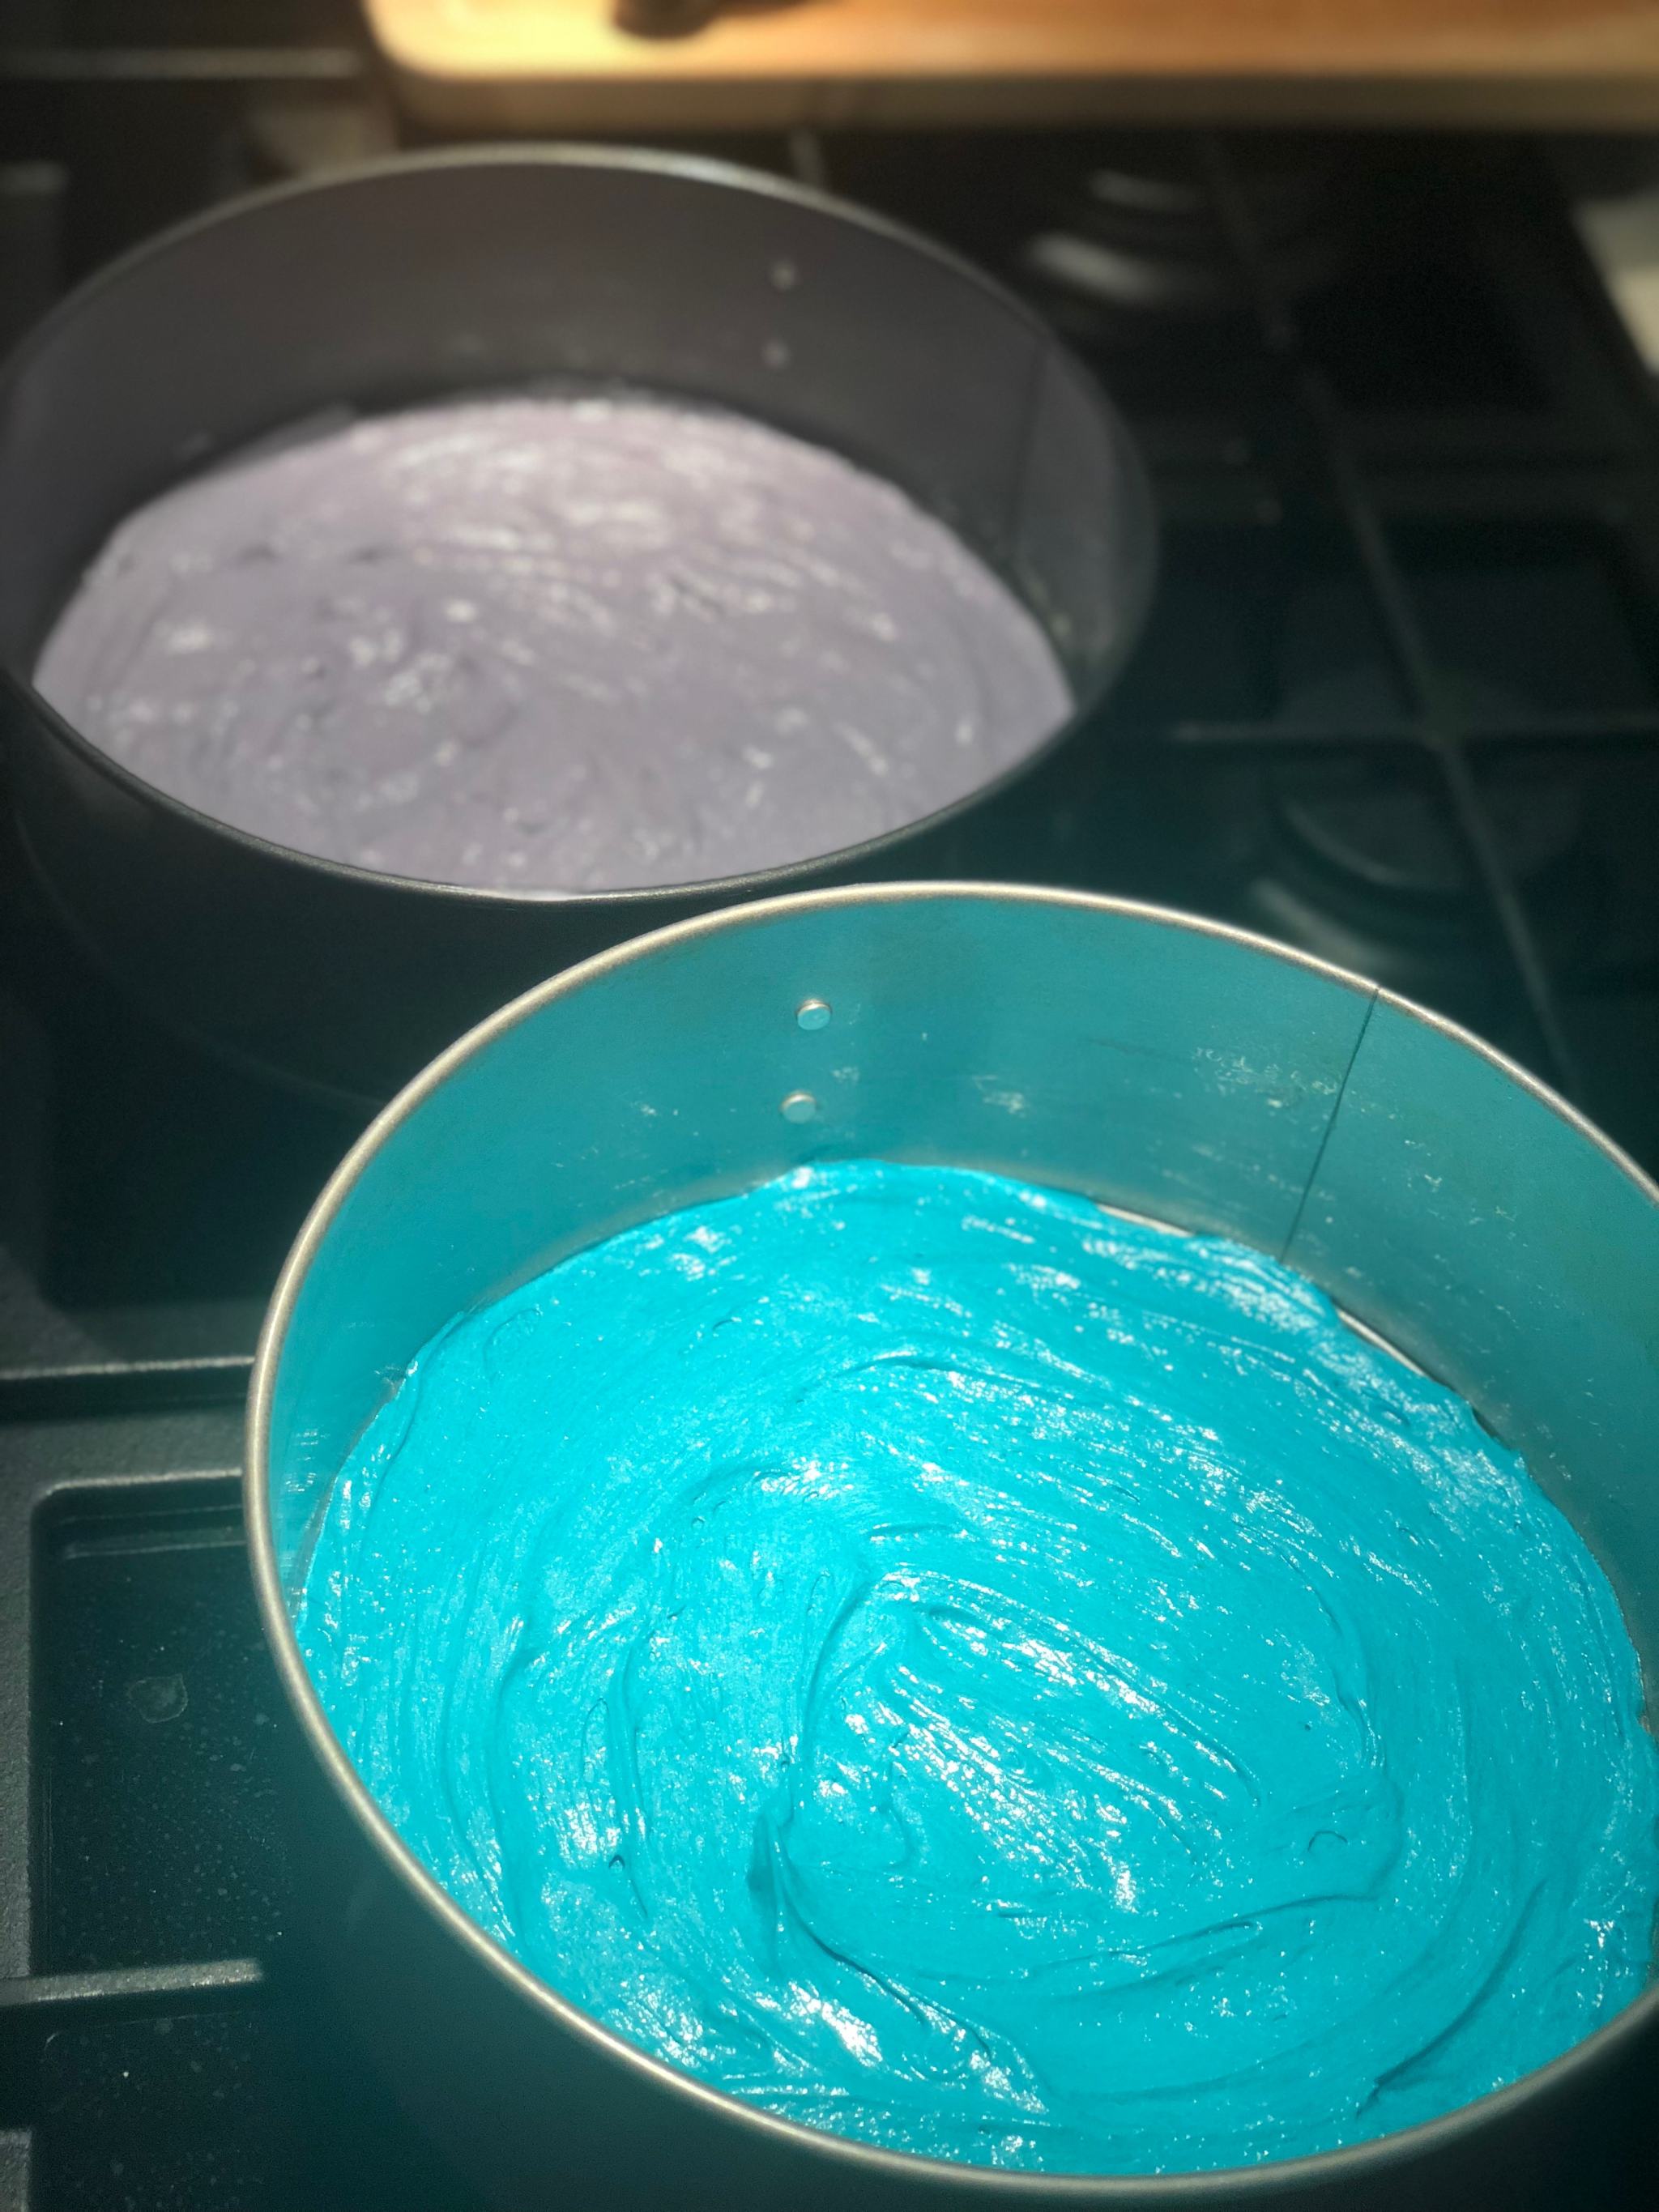
9. Pour the dough in the baking tin and spread it out evenly – this might be a bit tricky as the layers are going to be quite thin.
10. Bake for a total of 20-22 minutes, turning the tins around every 5-10 minutes, depending on your oven. If it doesn’t bake evenly, you will also want to rotate them. Do this as quickly as possible or the oven will cool down too much but be careful and don’t get burned!
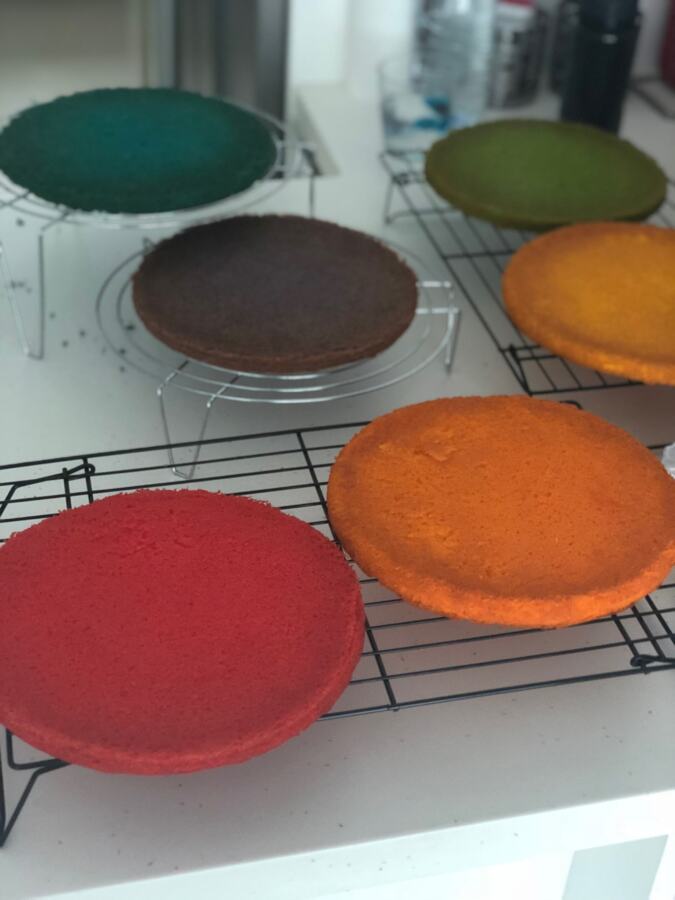
11. Once they are cooked (toothpick test might help) the sides will detach from the tin. Take them out of the oven, let them rest before releasing from the tin and then let them cool down completely, possibly on a rack.
12. Carefully pack them in plastic foil and freeze.

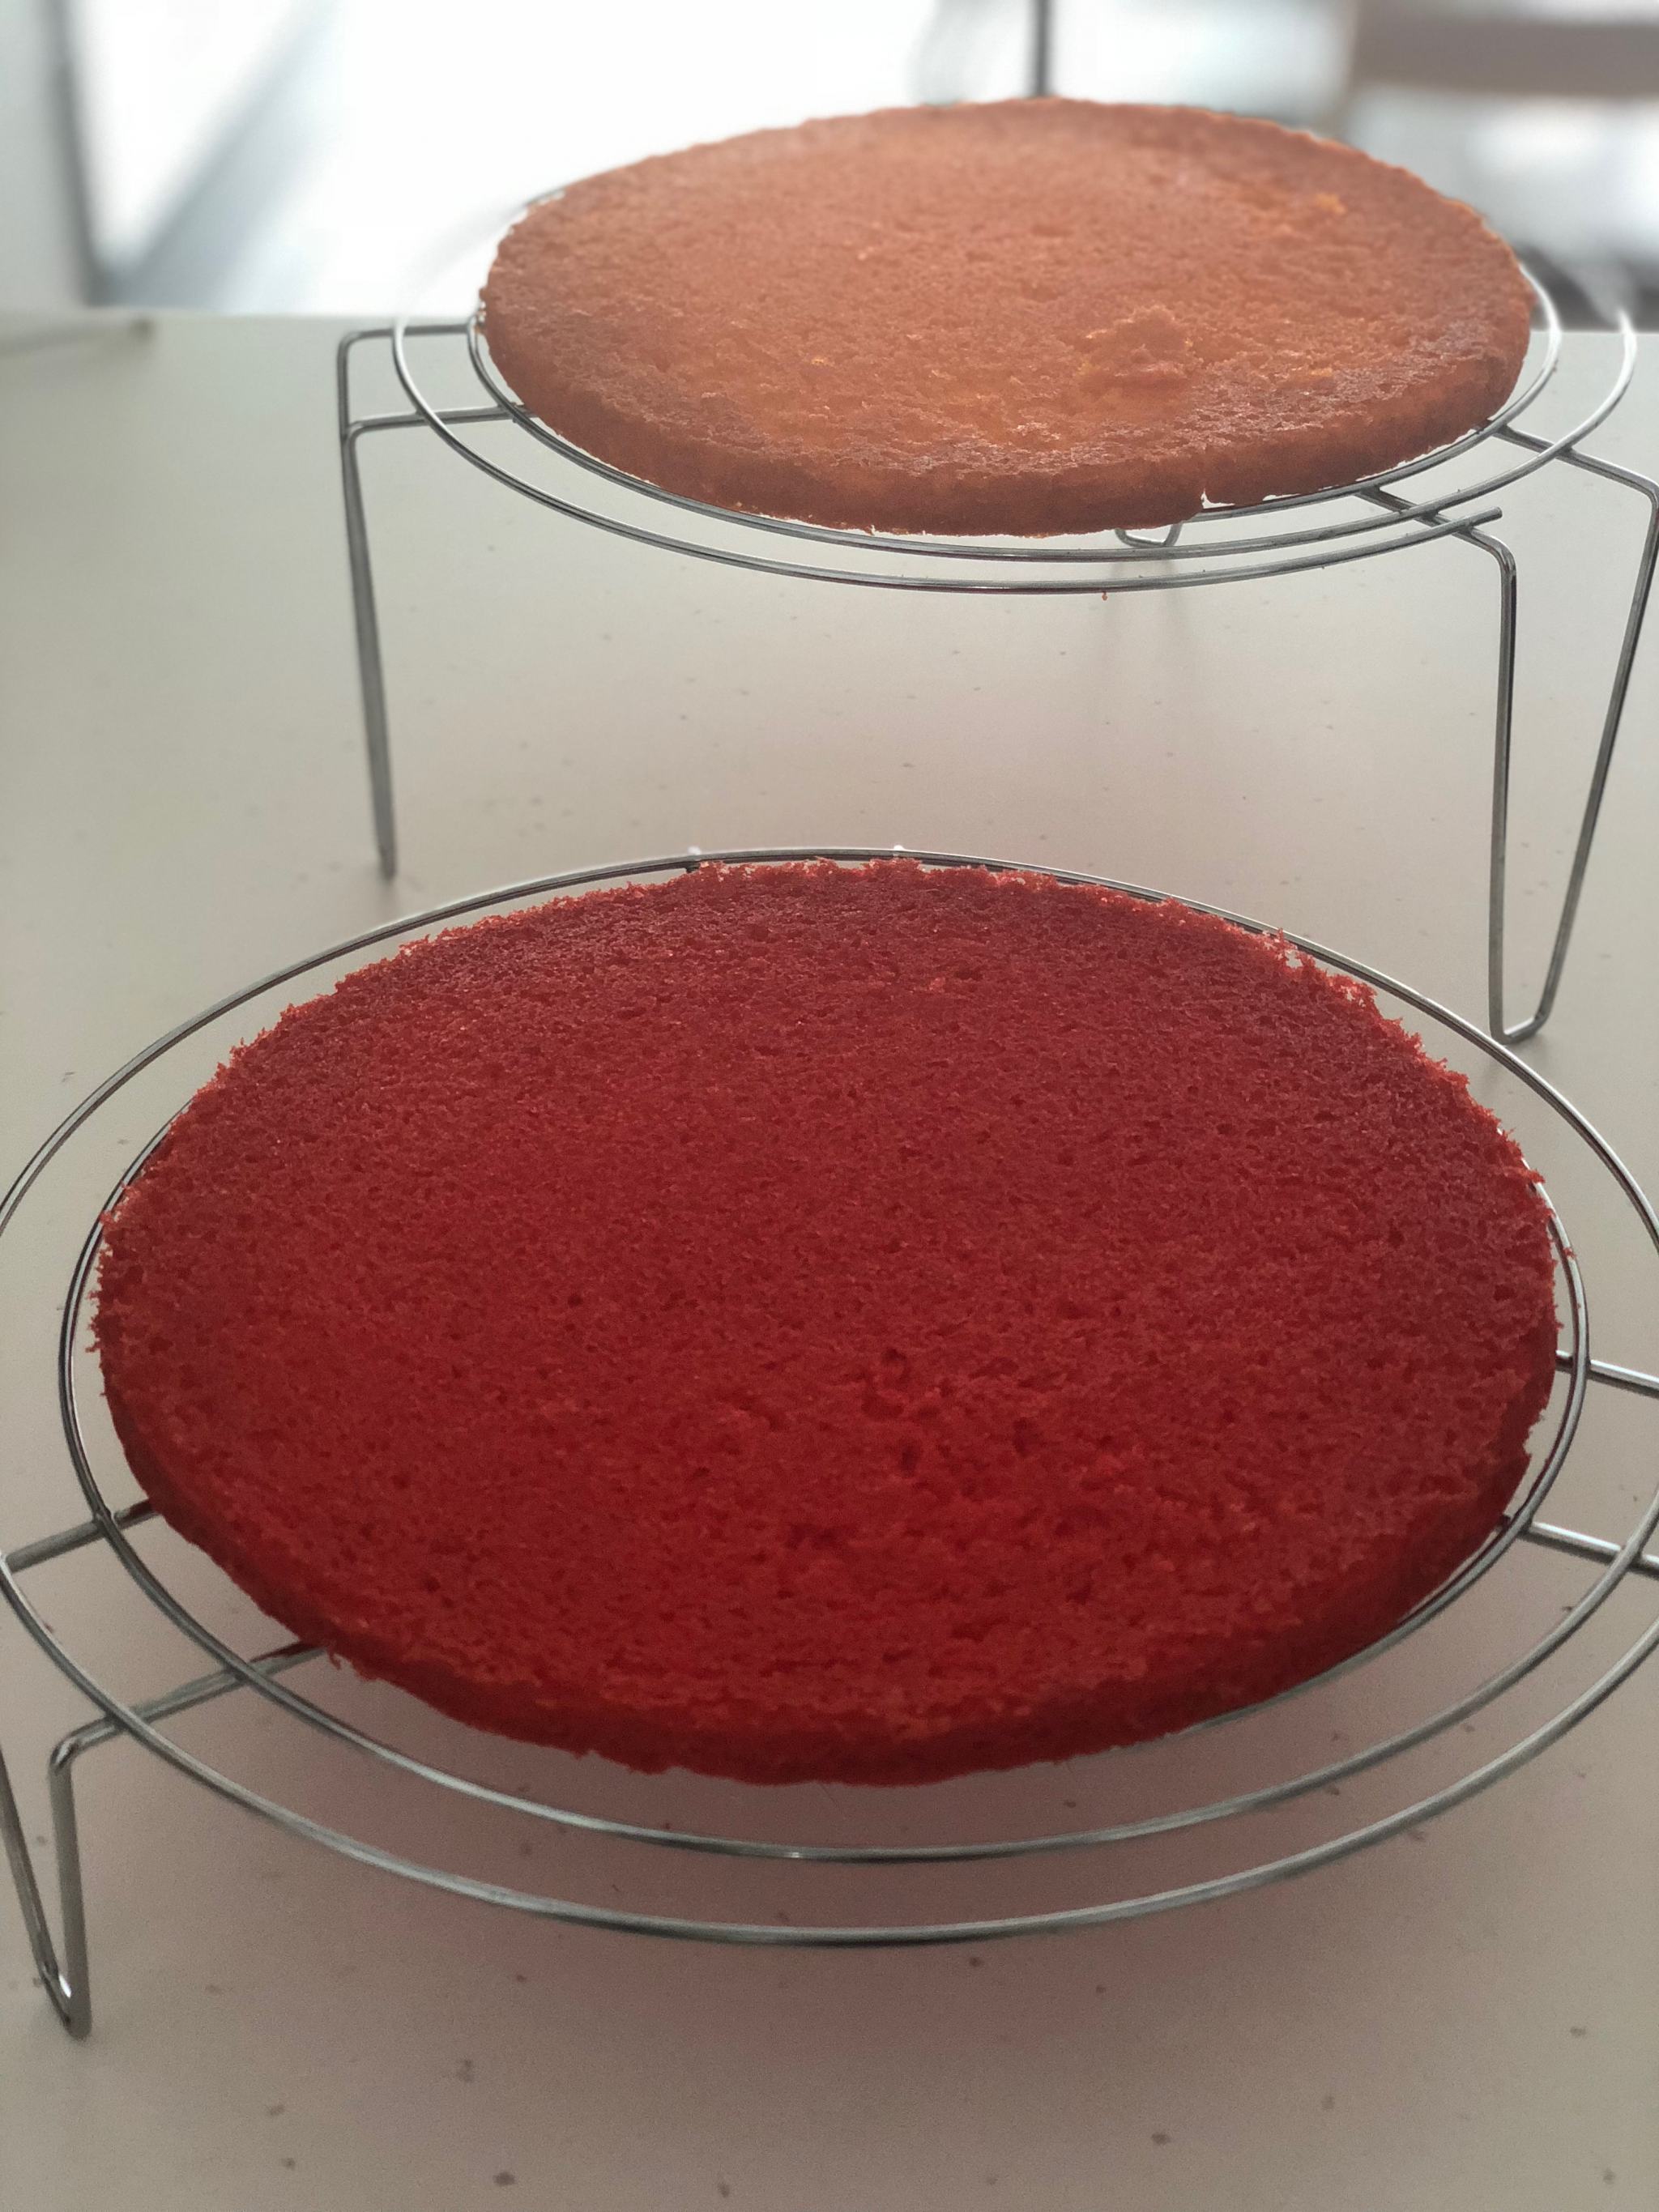
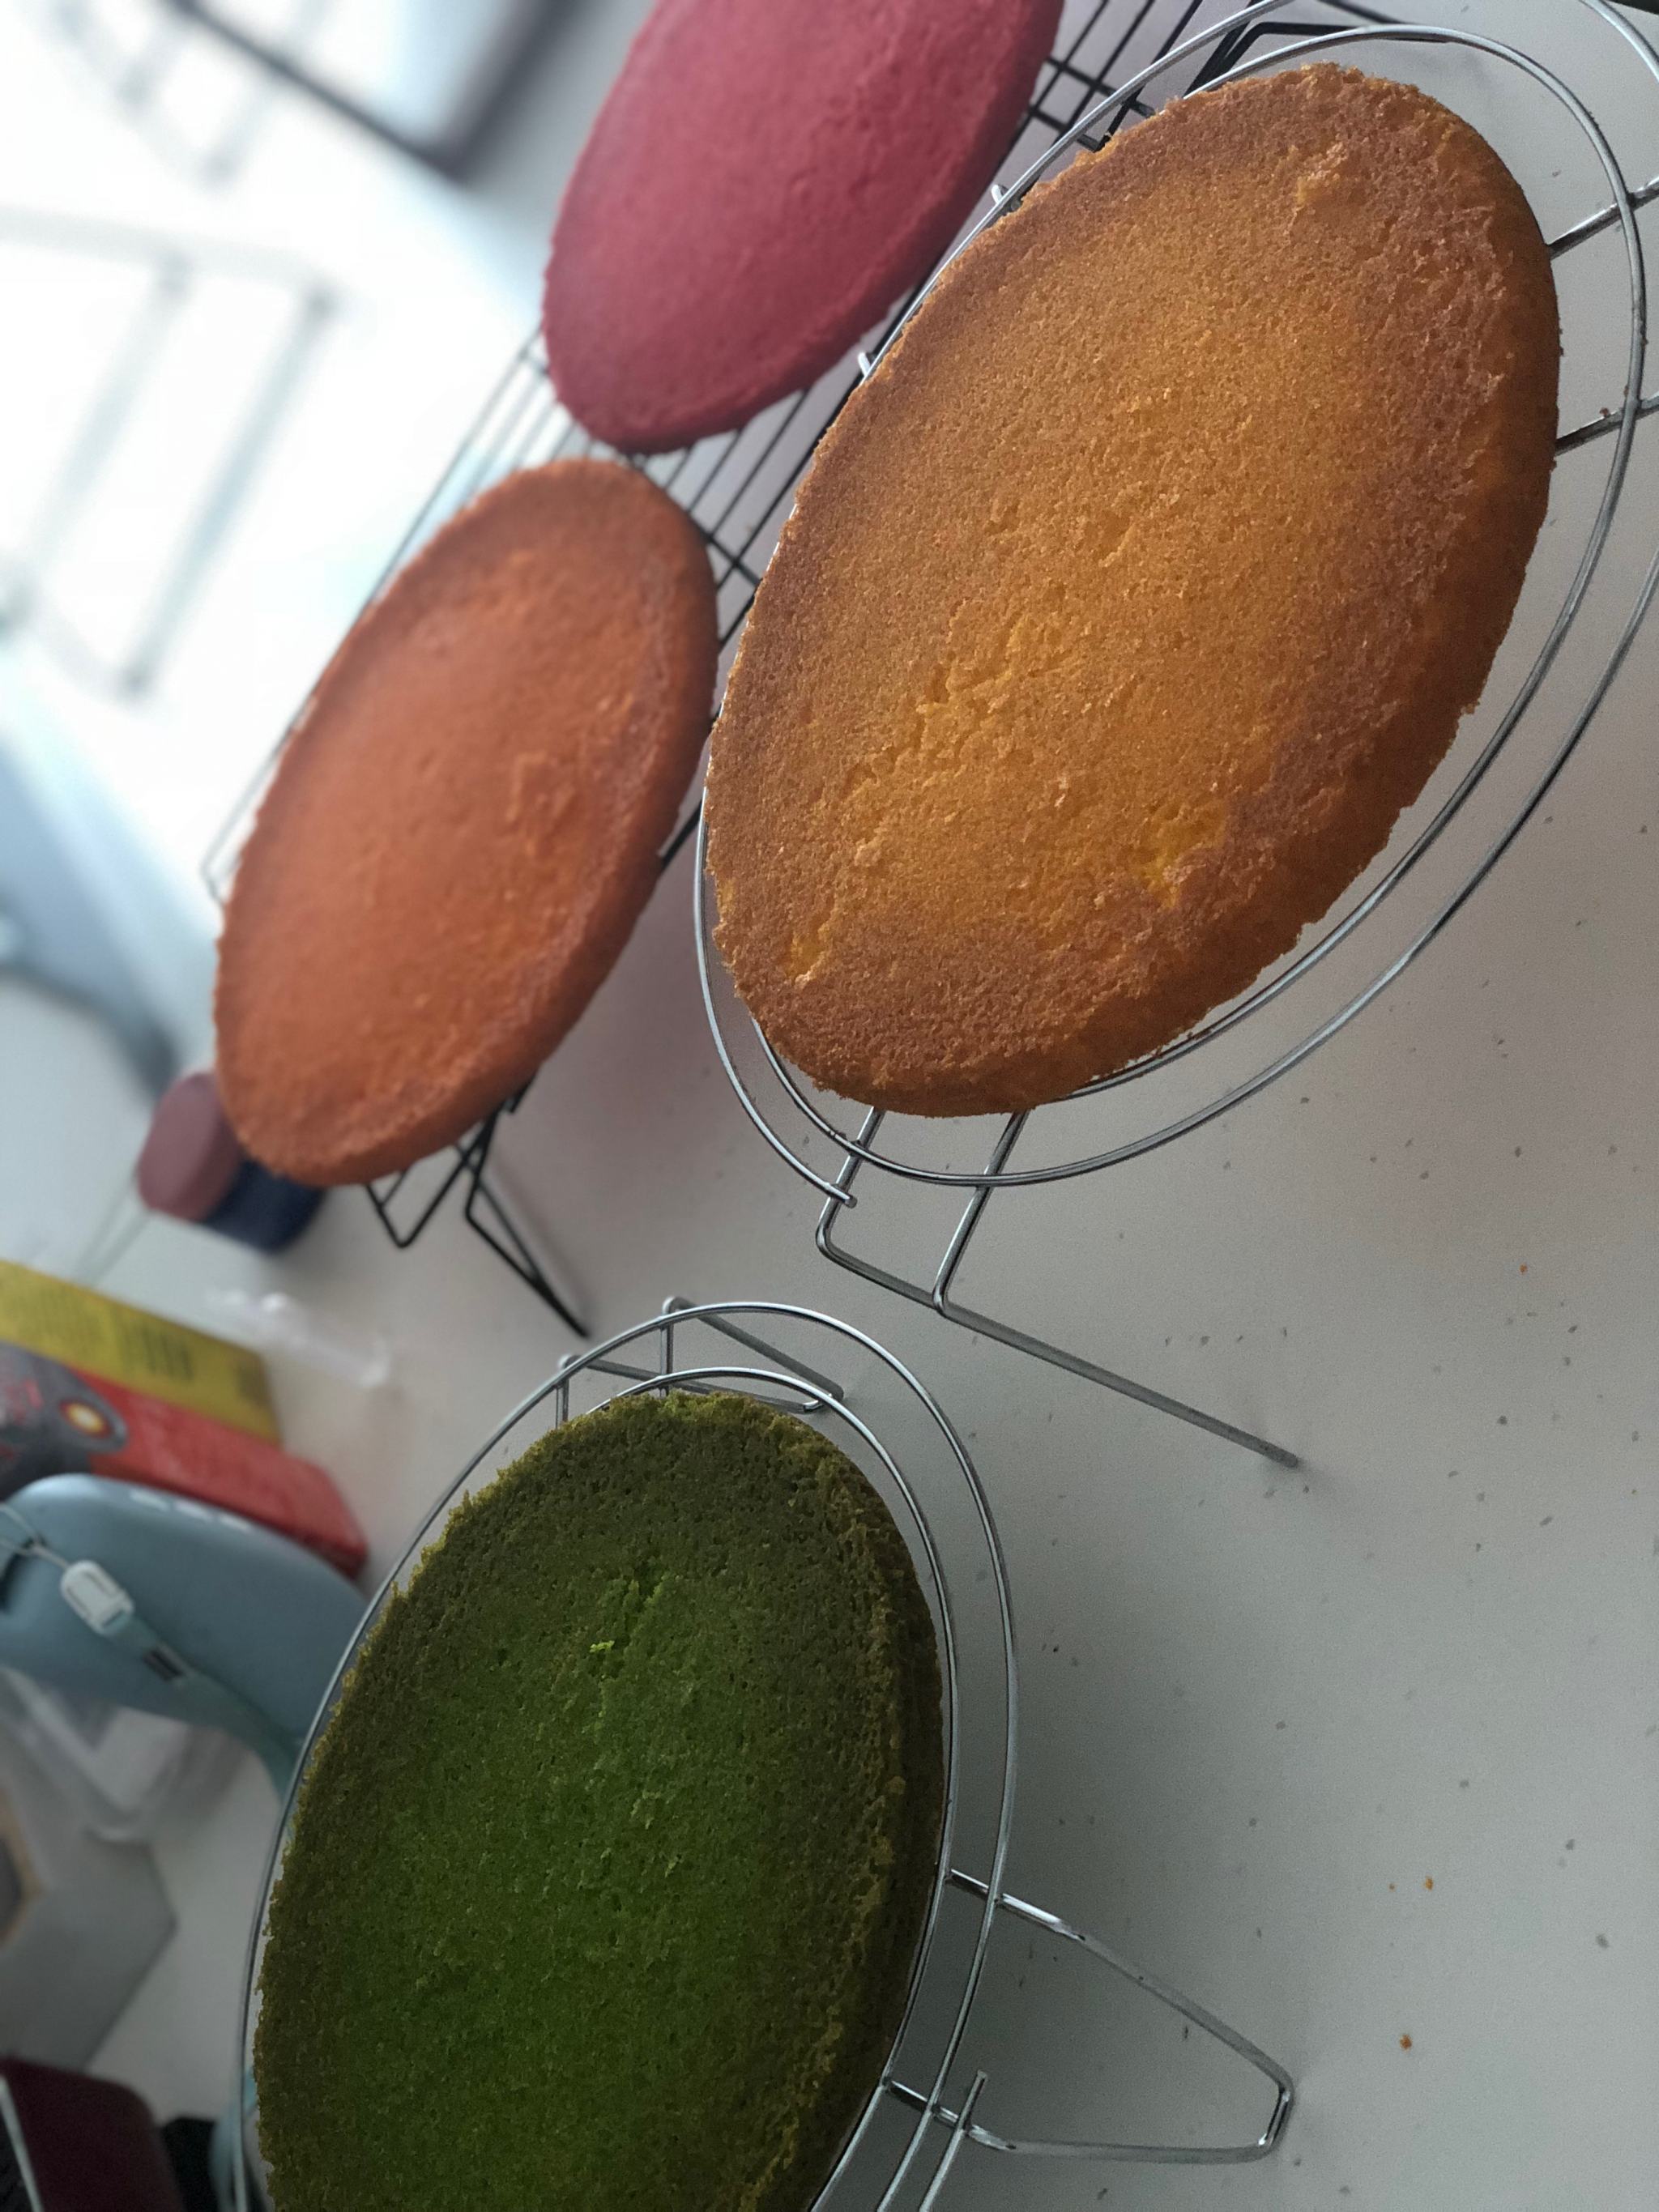
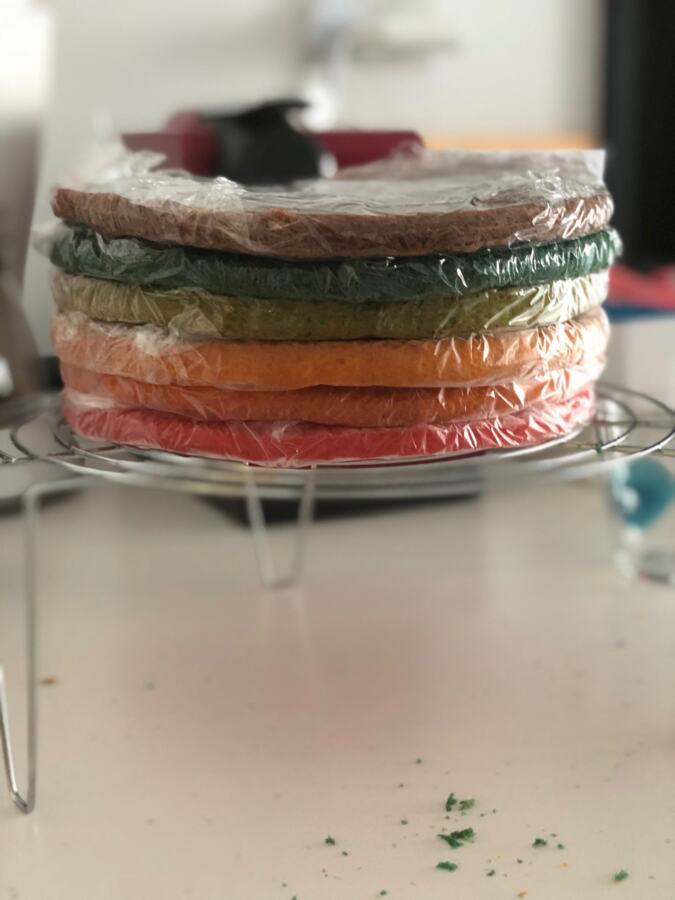
Great! You mastered the layers! In the freezer they well set and it will be easier to work with them later. Handle them with care, as they are thin.
Before we start assembling and frosting the rainbow cake, let me share with you some simple tricks and tips to make it easier.
Handy tools and tricks:
* Prepare your frosting about 40 minutes before you need it and let it rest in the fridge for 20-30 minutes, it is easier to deal with when it’s cold.
* I recommend you make it in two batches (250 g cream + 500 g mascarpone each).
* It is wise to have an extra portion, just in case you might use more then I did. Just make it if you need it.
* Frost two layers at a time and then let them set in the fridge for 30 minutes, this way the frosting won’t become runny and won’t soak the cake. Plan time ahead! It will take you a couple of hours, with many breaks in-between.
* While the layers set in the fridge, put also the frosting and the used piping bag with the leftovers in there to stay chilled.
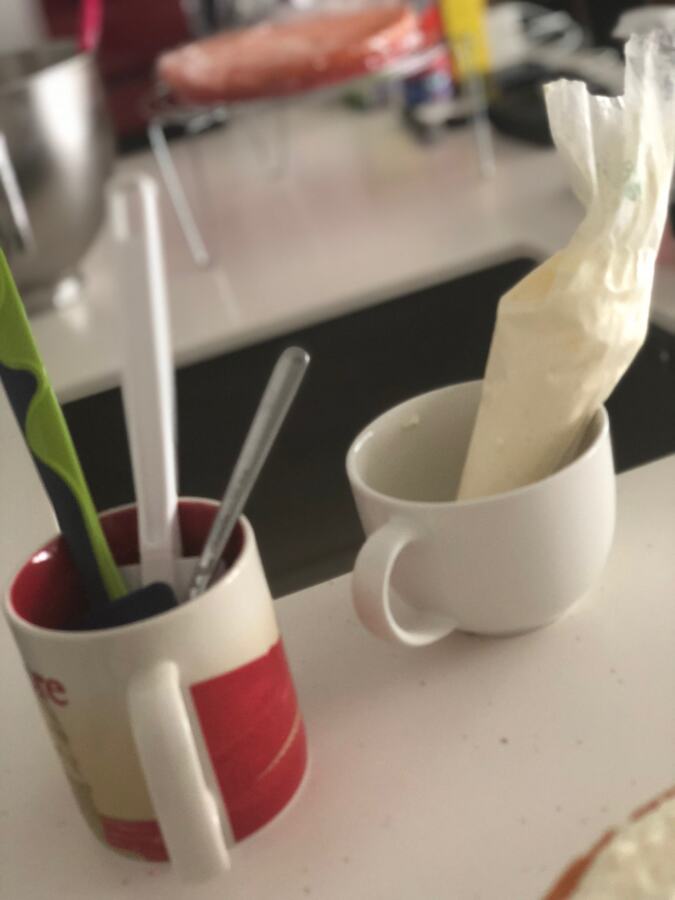
* Prepare all of your tools on a kitchen counter, once you start frosting, you want to have them all there: spatula in different sizes, spoons, piping bag(s), a high glass or cup (where you can place the piping bag in between), a high cup to collect your tools, baking paper cut in stripes, a cake stand to elevate the cake, clean kitchen towels, kitchen paper,…
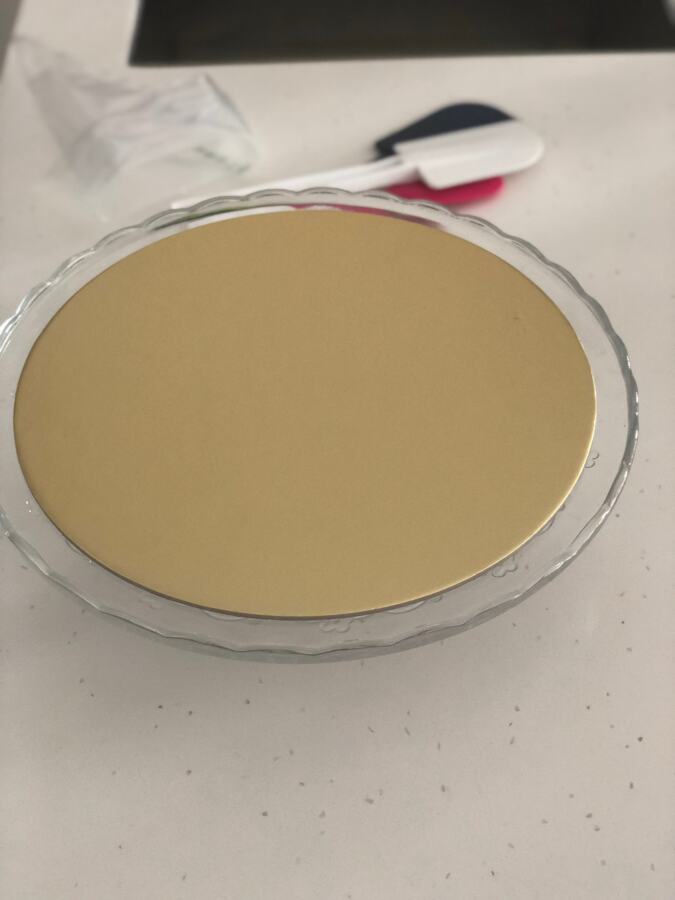
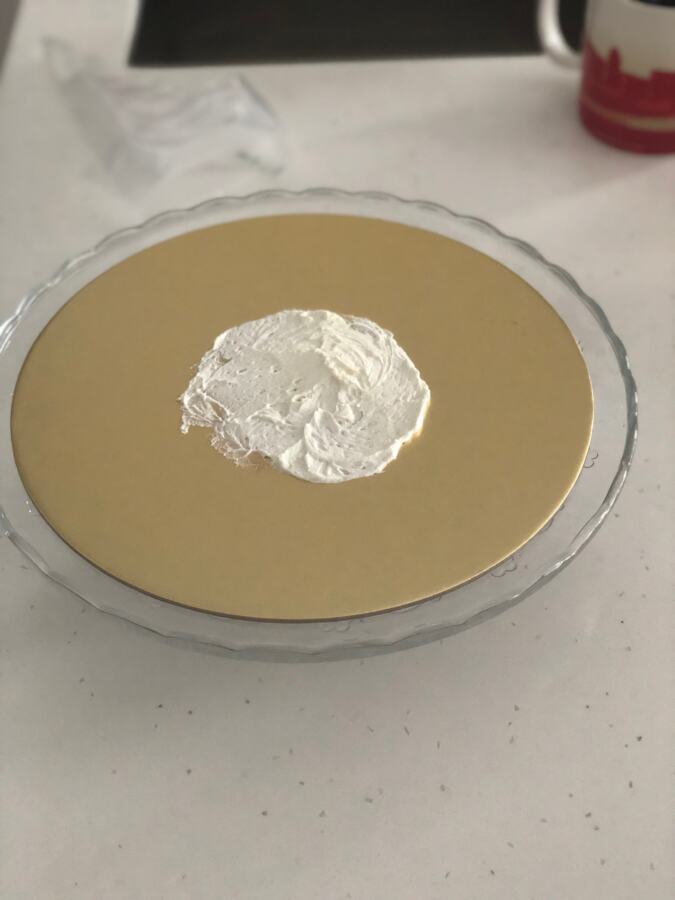
* Place some frosting on your plate before placing the first layer, this will make it stick.
* Before frosting the sides, slide some baking paper stripes underneath the cake, this will prevent the plate from getting dirty.
* Make space in your refrigerator: you will need to chill both the cake and the frosting!
* Have a look at tutorials and videos about frosting techniques, if you are new to it. This will prepare you on how to proceed.

Frosting instructions:
1. Prepare the frosting by whipping up 250 g of full cream until firm.
2. Add 500 g of mascarpone cheese a little at a time (I divide it into 3-4 batches) and mix it well. Either with a spatula and movements from the bottom to the top or with a kitchen machine by activating the whisk shortly and at low speed.
3. If you wish, add 3 tablespoons of icing sugar.
4. Let the frosting rest in the fridge for 20 minutes.
5. Get the layers out of the fridge and let them rest at room temperature.
6. This quantity will be enough for 3-4 layers. Repeat the process once this batch is used up.
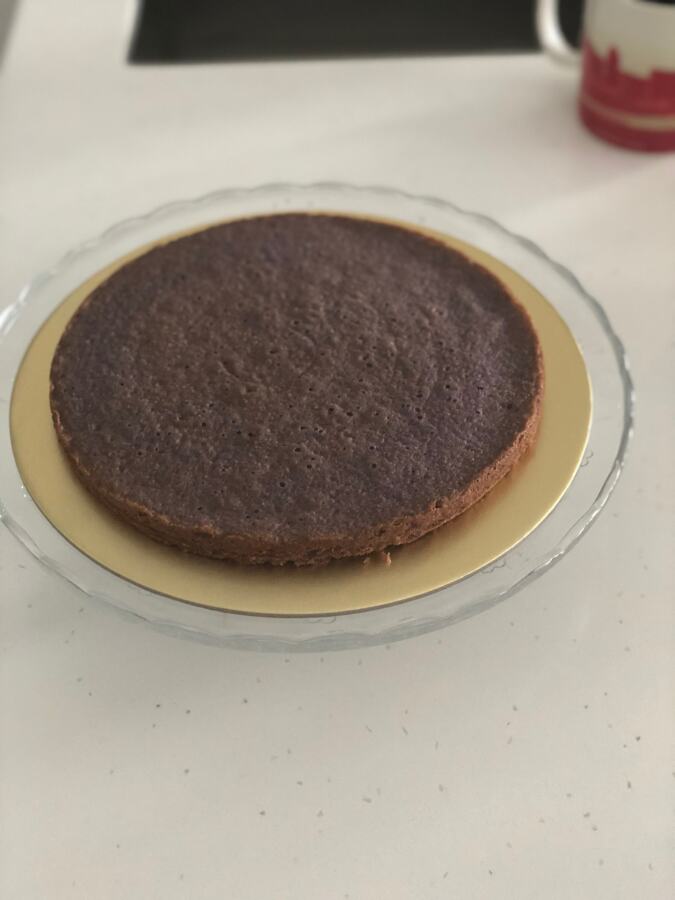
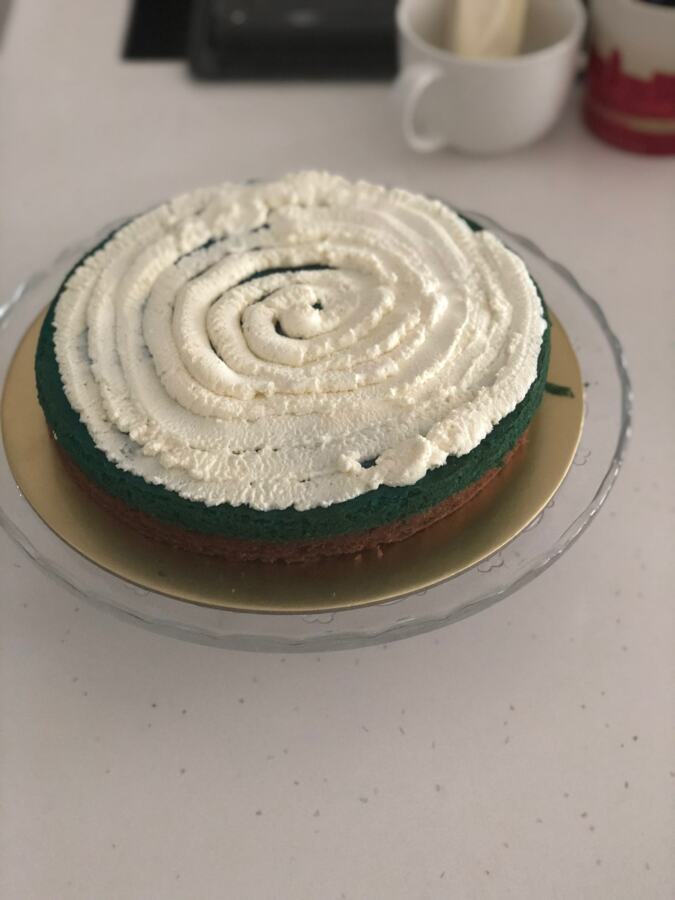
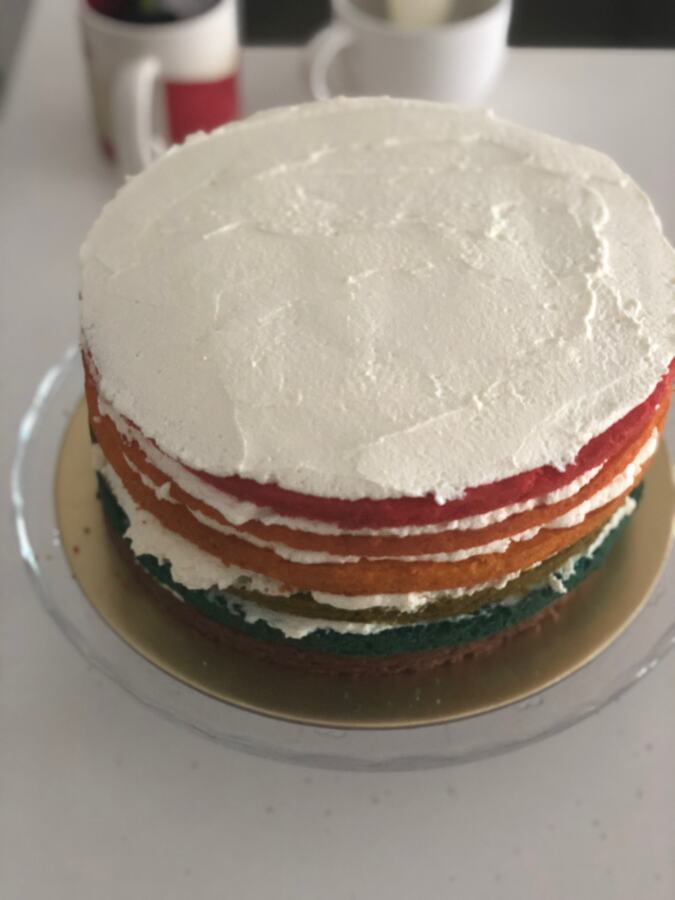
7. Put a little bit of frosting on your plate and place the purple layer on it.
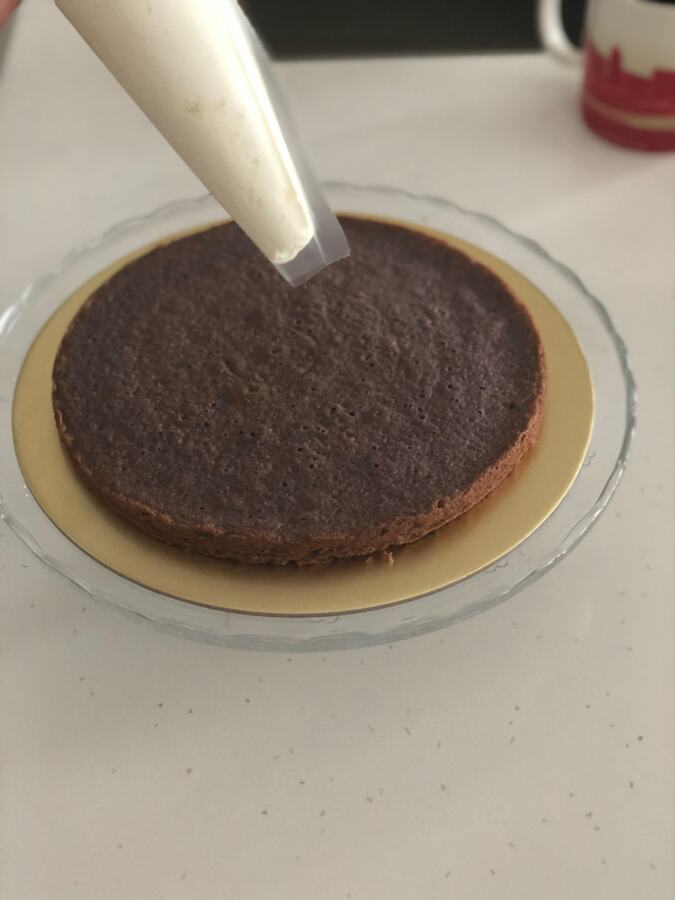
8. Fill your piping bag with some frosting. Cut the bottom (one cm max). Squeeze from the top and spread the frosting on the cake. I make circles starting from the edges.
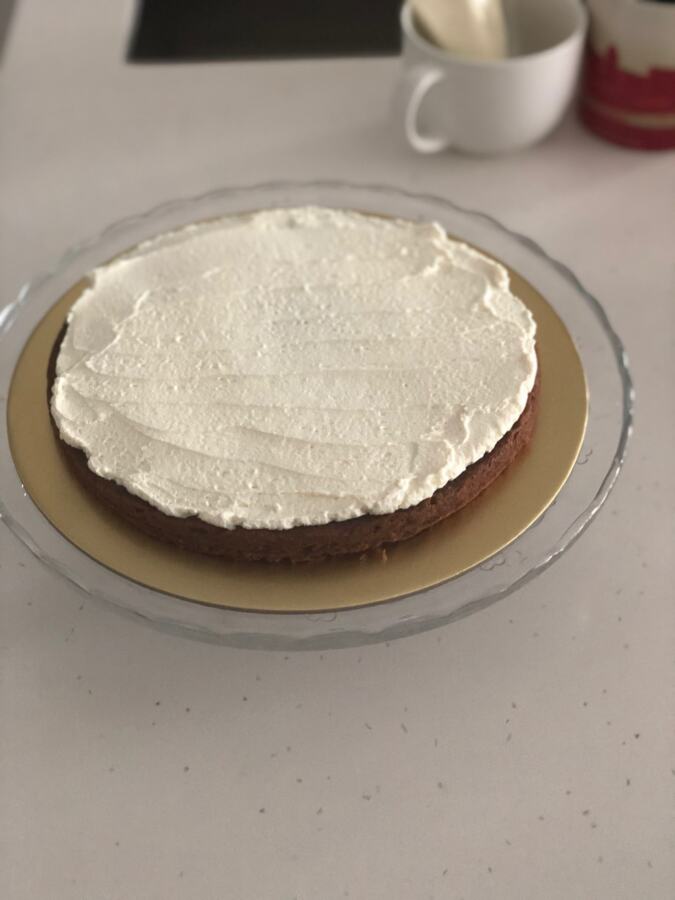
9. With a spatula flatten the frosting. Don’t press too much, be gentle.
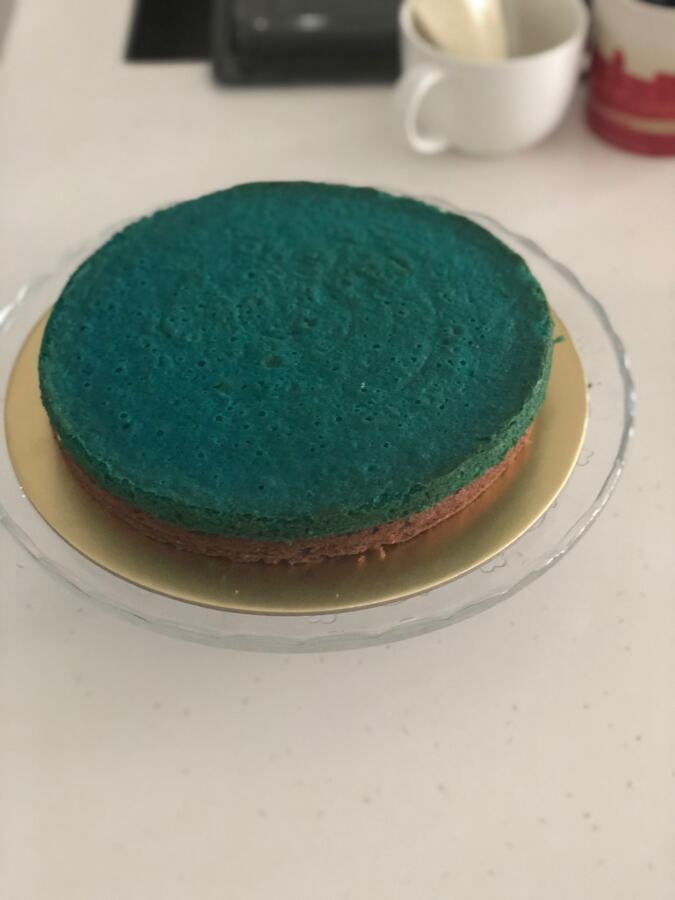
10. Place the blue layer on it and repeat.
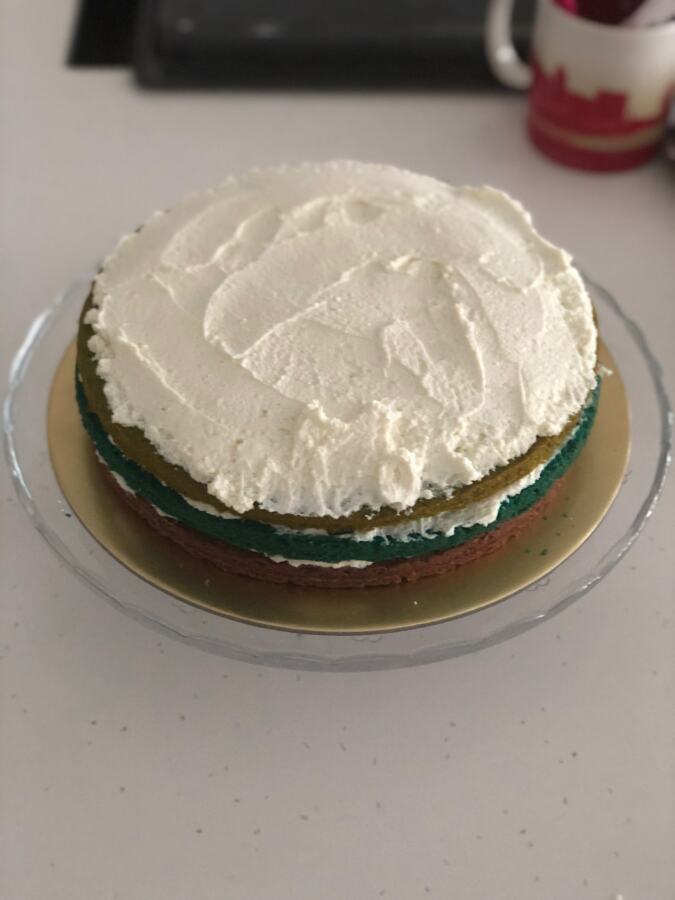
11. Set it in the fridge to rest for 30 minutes. Relax and have a coffee.
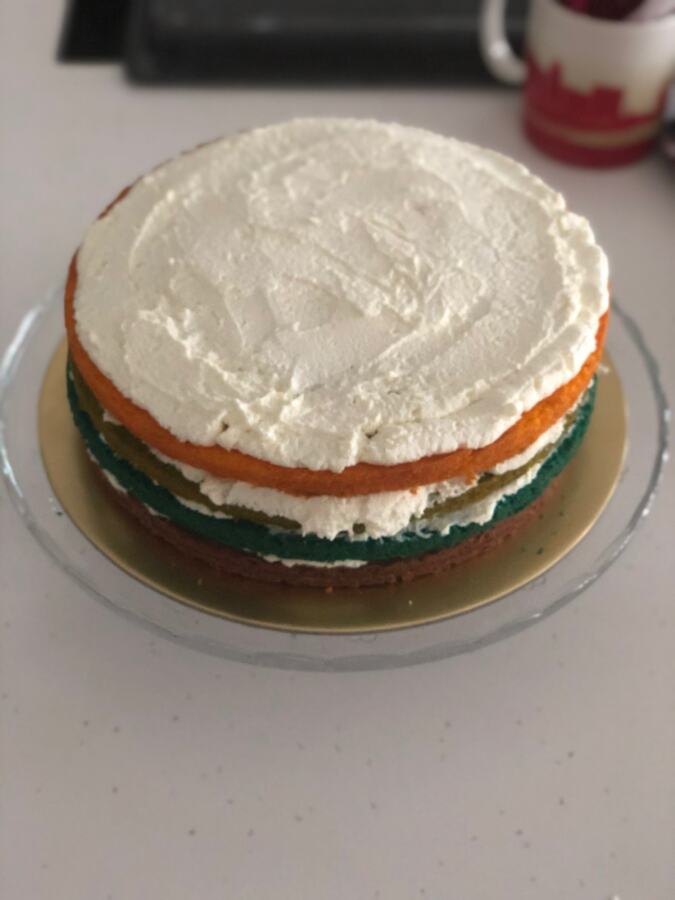
12. Get everything out from the fridge and frost the green layer.
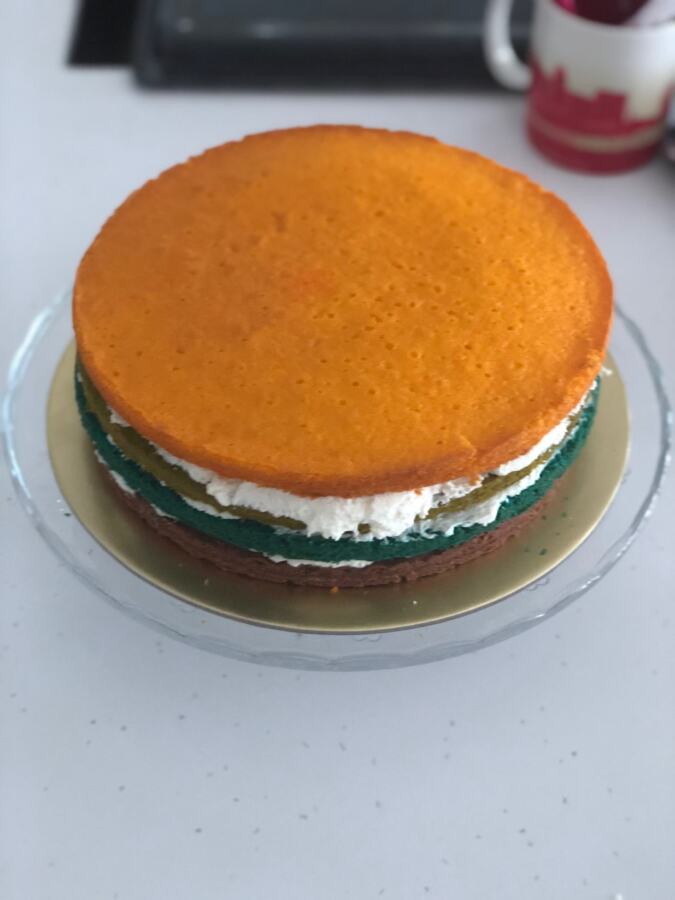
13. Yellow layer – frosting.
14. Back in the fridge for 30 minutes.
15. At this point, you will probably need to make the second batch of frosting.
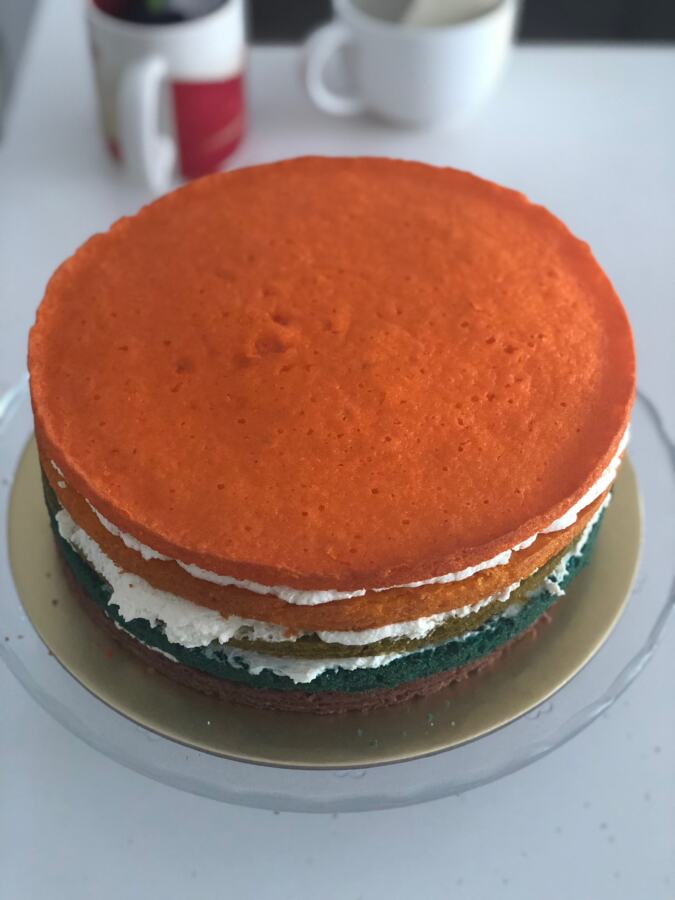
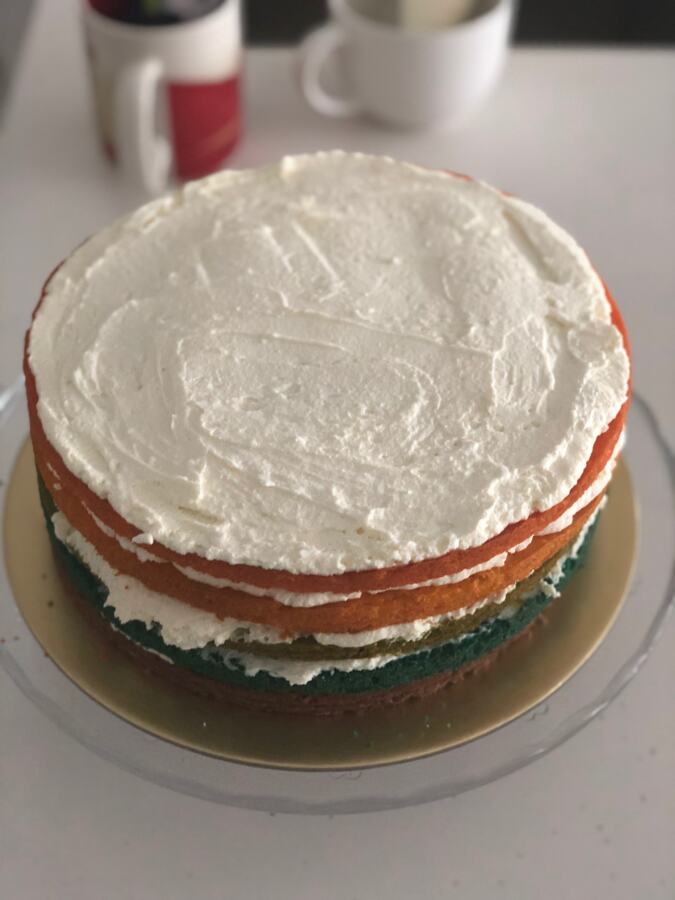
16. Orange layer – frosting.
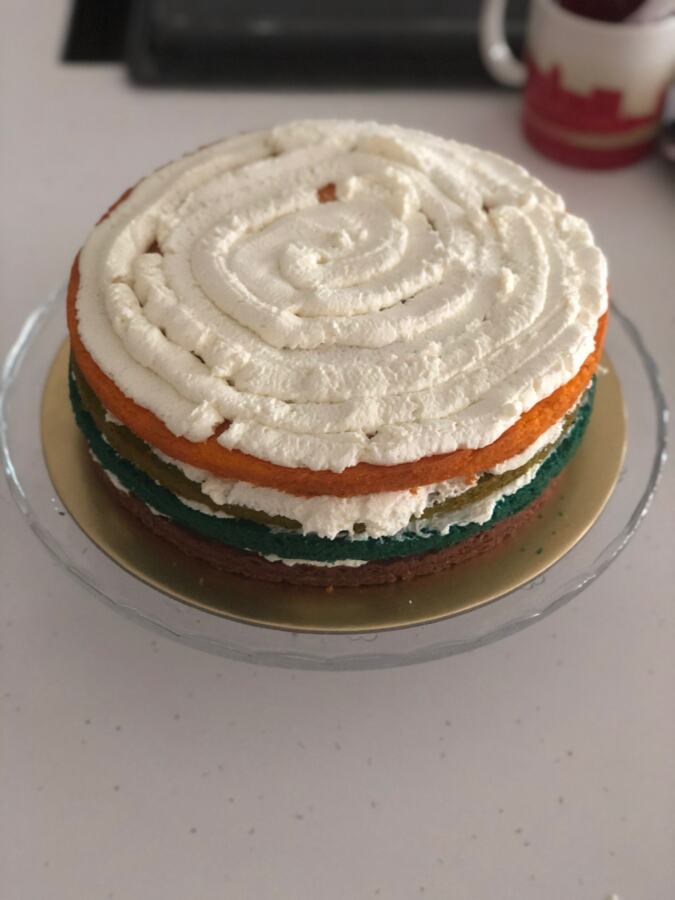
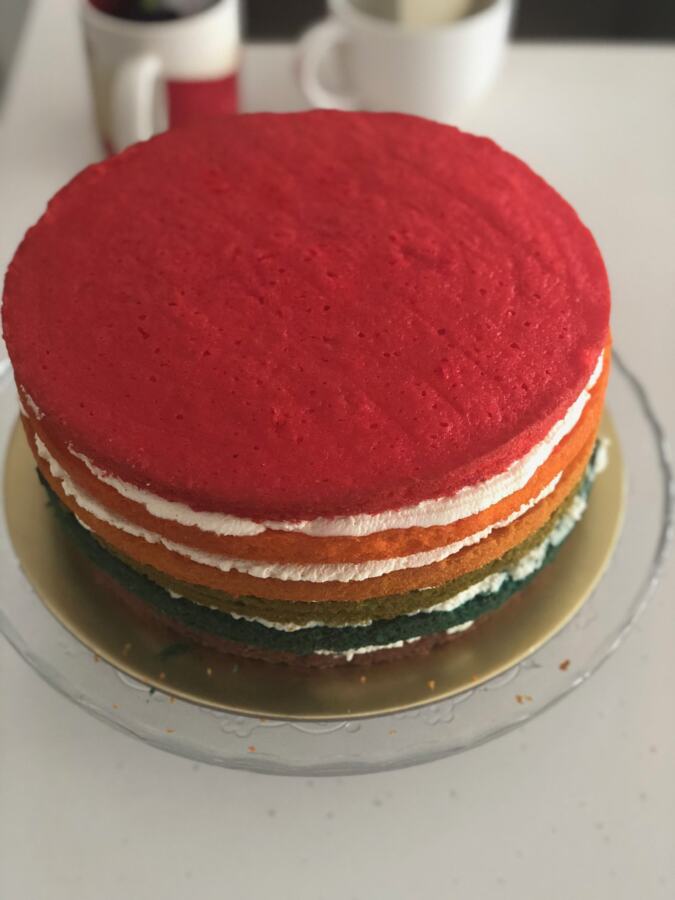
17. Red layer – yes, it’s the last one! – a gentle amount of frosting on the top.
18. Put the baking paper stripes underneath the cake to prevent the plate from getting dirty.
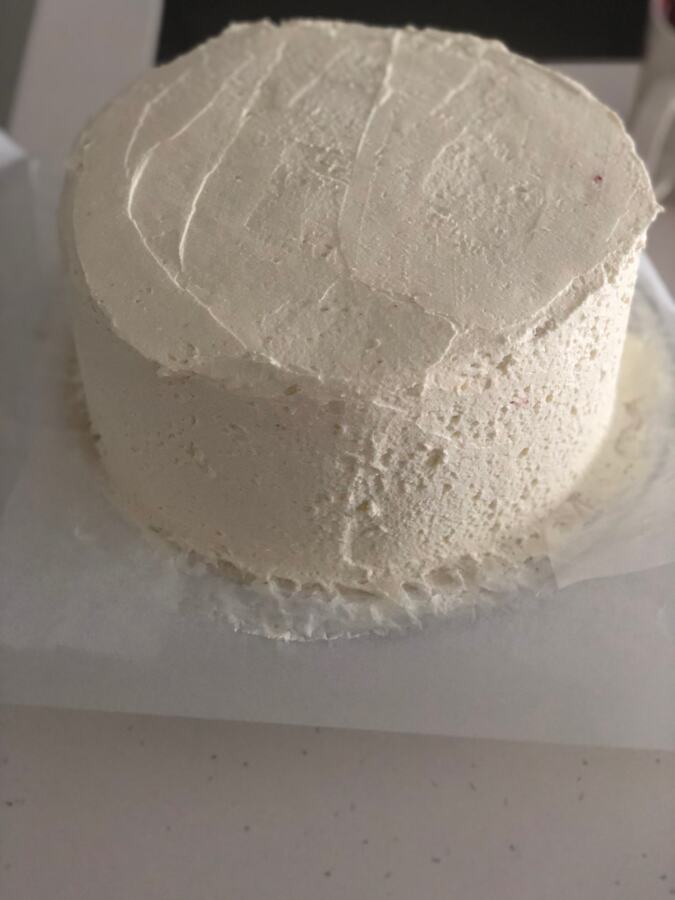
19. With a long spatula start spreading the frosting on the sides. Get a lot of frosting and try not to go back and forth, but move only after having placed the spatula on the frosting. You don’t want too many crumbs, as you will see them.
20. At the end, you will probably need to add some frosting on the edge, do this with a smaller spatula and carefully.
21. Save the excess frosting for touch-ups.
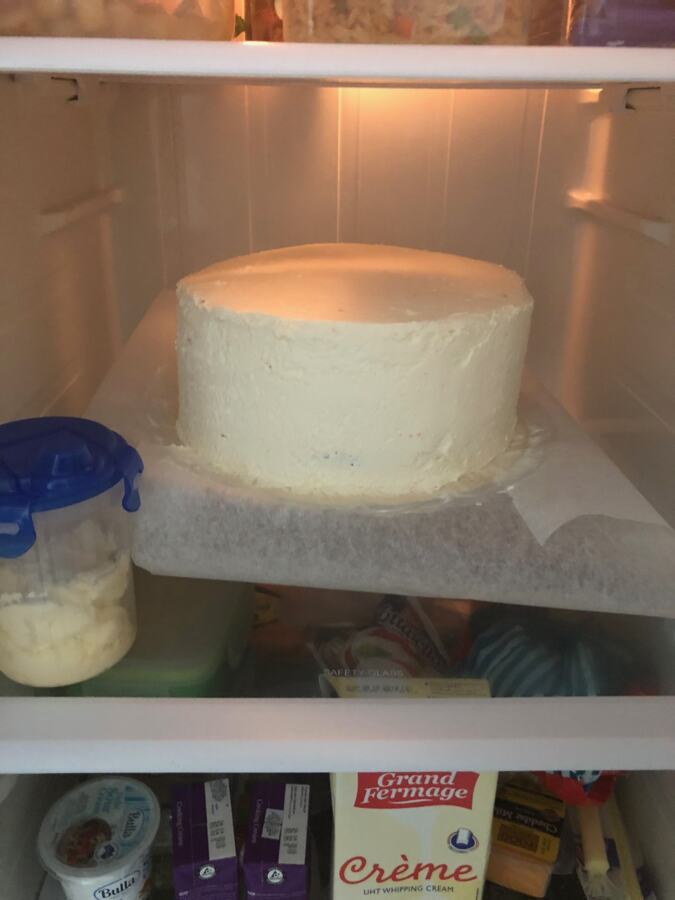
22. Chill in the fridge.
23. Remove the paper carefully, you might need to hold on to the frosting with a spatula, and decorate before serving!


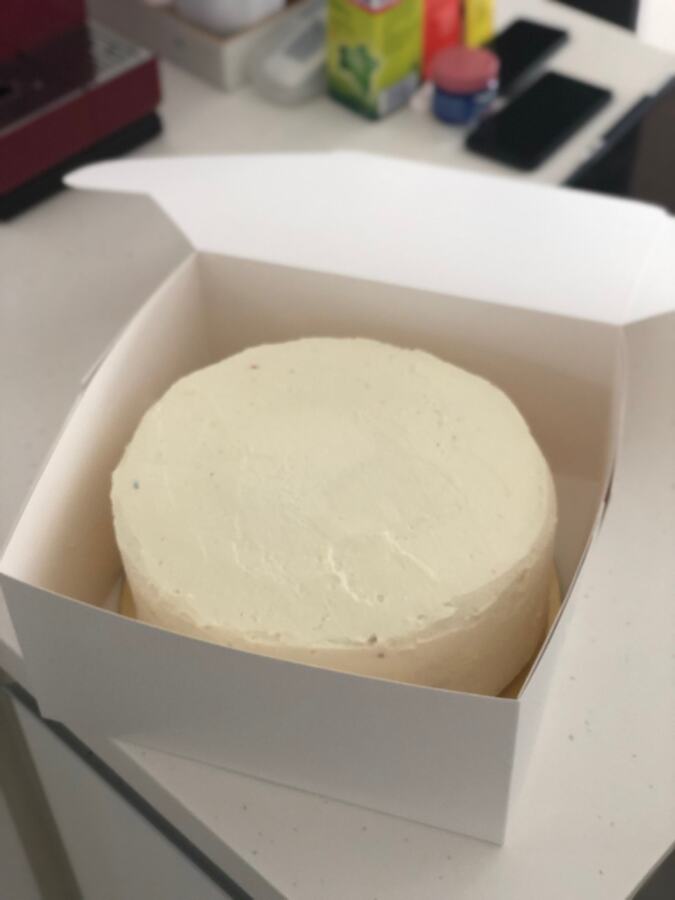
I really hope you will enjoy this beautiful and delicious cake!
If you have any questions, reach out to me through the contact form.